Showing posts with label unique embellishments. Show all posts

Saturday, May 6, 2017

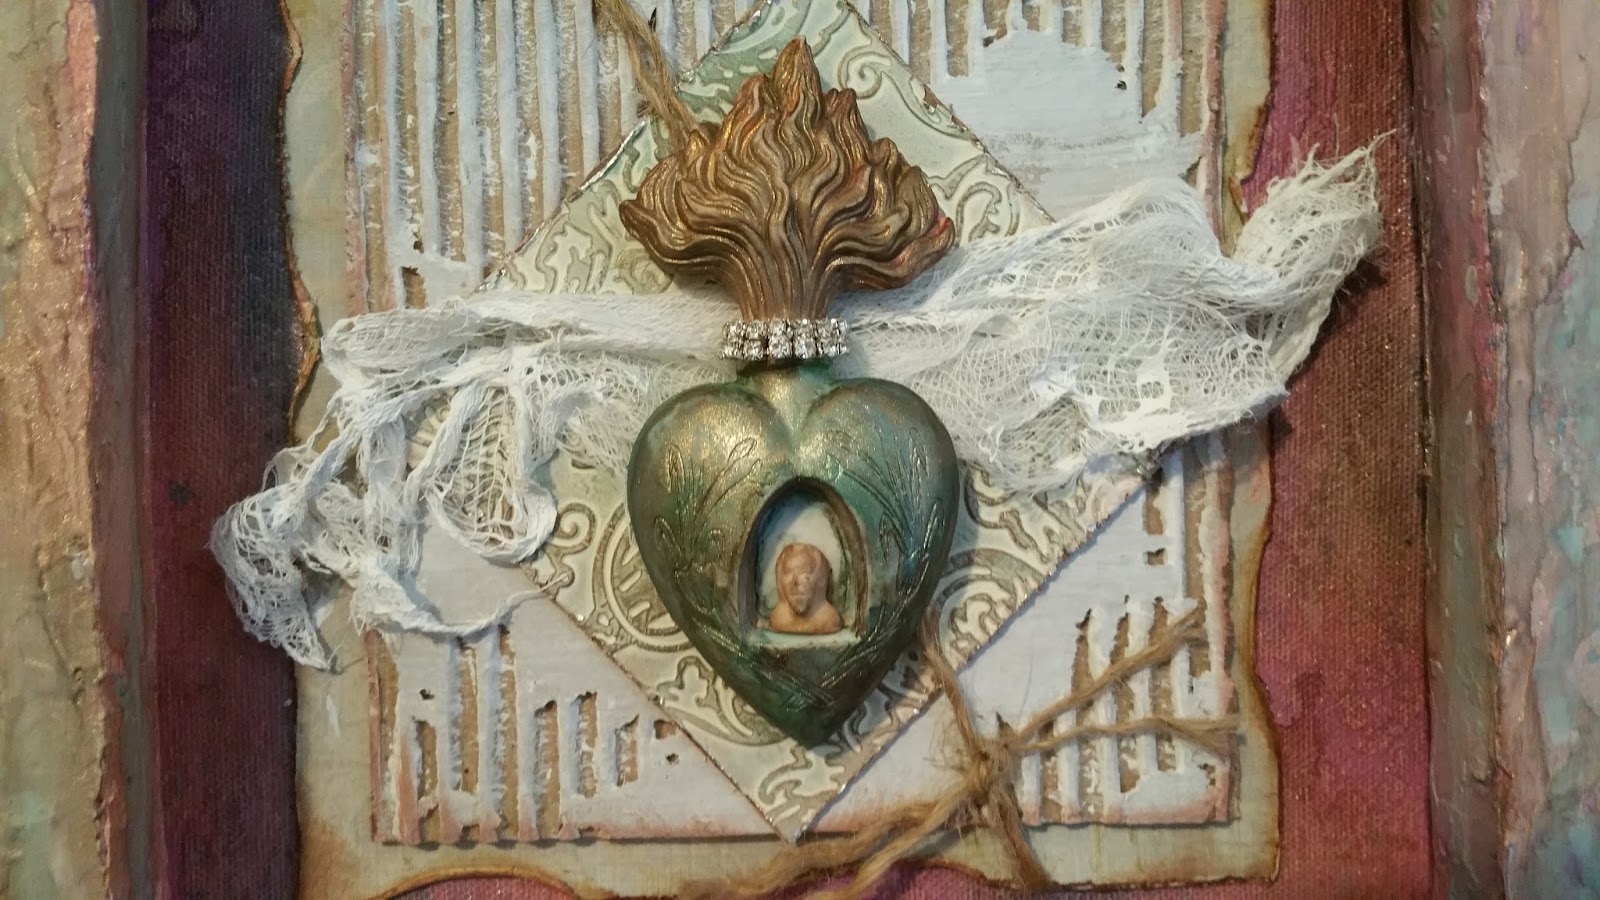
Write It On Your Heart Canvas

Life is too short to waste time doing things that don't bring us happiness, but what really gives life meaning is the relationships we have with those we love. I think first of family, but we have friends we love like family, too.

This canvas is created using an 8" square museum canvas (1 1/4" deep) turned upside down and distressed using modeling paste, inks, and paints. Inside, I've used card stock, corrugated paper, embossed chipboard, twine, cheesecloth, and a resin heart artifact by Prima Marketing. Layers of  paint, ink, and metallic paste provide a rich surface reflecting multiple colors.  


Write it on your heart that the ones you love are life's most precious gifts. Always be thankful for the blessings of loved ones!

Thursday, June 21, 2012

I Love Stars!

I really wanted a large 3-d star to set on my mantle. All of the tin stars were too small or too large or too pricey. All of the paper mache stars were too small. Hmmm. I could make my own, right?  That's the best way to get one just the size I want, for the price (practically free) I want... Soooo, I gathered up some empty cereal boxes, glue, masking tape, scissors, and made a star. Well, first I made a pattern. I used this tutorial: http://rubberstamping.about.com/od/projects/ss/Paper_Star.htm . It wasn't exactly the easiest method, but I made it work. I enlarged the pattern, so my finished star would be about 16" point-to-point. The pattern needs to be a little bit larger than the desired finished size, because it adjusts a bit when the points are pushed up/out to make it 3-d.

Anyway, using my new pattern, I cut 5 points from my cereal boxes, folding along the fold lines and gluing where indicated in the instructions, turning the printed side to the inside. I used strips of masking tape to hold them in place while the glue dried. I also used it to reinforce the joints and seams after the glue was dry. I planned to cover the star anyway, so the tape was not going to show. When the glue had dried, I covered the outside with a layer of vinyl spackling. An easy shortcut here, is to mix some regular acrylic craft paint into the spackling before it is applied. This cuts out the painting step. After the star dried, I antiqued it with a dark brown glaze and wiped off the excess. A coat of sealer and it was done. I just wrapped a strip of patriotic fabric tied a bow, but I am already planning to replace it with different ribbon and embellishments for other seasons, so I can use it year-round.

Cardboard form.
Honestly, it would be a lot easier to buy one ready-made. Since I couldn't find what I wanted, this is a great solution, but it was a little more work than I would normally do for a simple cardboard doodad.
The other upside is that is didn't cost anything, because I already had all the supplies on hand...overall, it's a winner!


Covered with spackling.


Monday, July 25, 2011

Handmade Decorative Brads


    It's been really hot the past few weeks, so I've been working on stuff indoors to stay away from it as much as possible. High temperatures and I do not get along very well, a trait I attribute to my Irish ancestry. Fortunately, I can always find something to keep me busy.
   Sometimes I'm just looking for a little unique touch to complete a card or project. I saw an idea to make your own magnets using this technique, and I decided to apply it to card making by making custom brads, instead. The process is simple, use oven-bake clay, cover the end of the brad with a small ball of it, being sure to wrap it around the back up to the prongs. Flatten the clay on the back, but leave the top of it somewhat rounded. Use any texture you'd like and gently press the top onto it, leaving an impression. You can use rubber stamps, embossing folders, fabrics, or any other textured surface. Bake according to the package directions. Paint, ink, antique or finish however you want.
   I used a background stamp from CTMH called Paisley Tapestry to heat emboss a piece of burgundy card stock with silver glitter embossing powder, then made matching brads that I painted silver and antiqued with burgundy ink. Viola! Coordinated paper and brads! Using silver paper, I die-cut and embossed a lace trim, using both the positive and negative strips. White satin ribbon makes a bow and overlays the trim. An all white flower arrangement with beaded stick pin completes the layout. 

Supplies:
Bazzil Basics card stock, Spellbinders Classic Lace Border die, Paisley Tapestry background stamp from Close to My Heart, Large flowers from Magnolia. I used Super Sculpey oven bake clay and the silver paint is Folk Art Acrylic in Metallic Silver. Silver paper, small flowers, pin, and ribbon from my stash.